05 febbraio 2014

Retromobile: una prima impressione modellistica

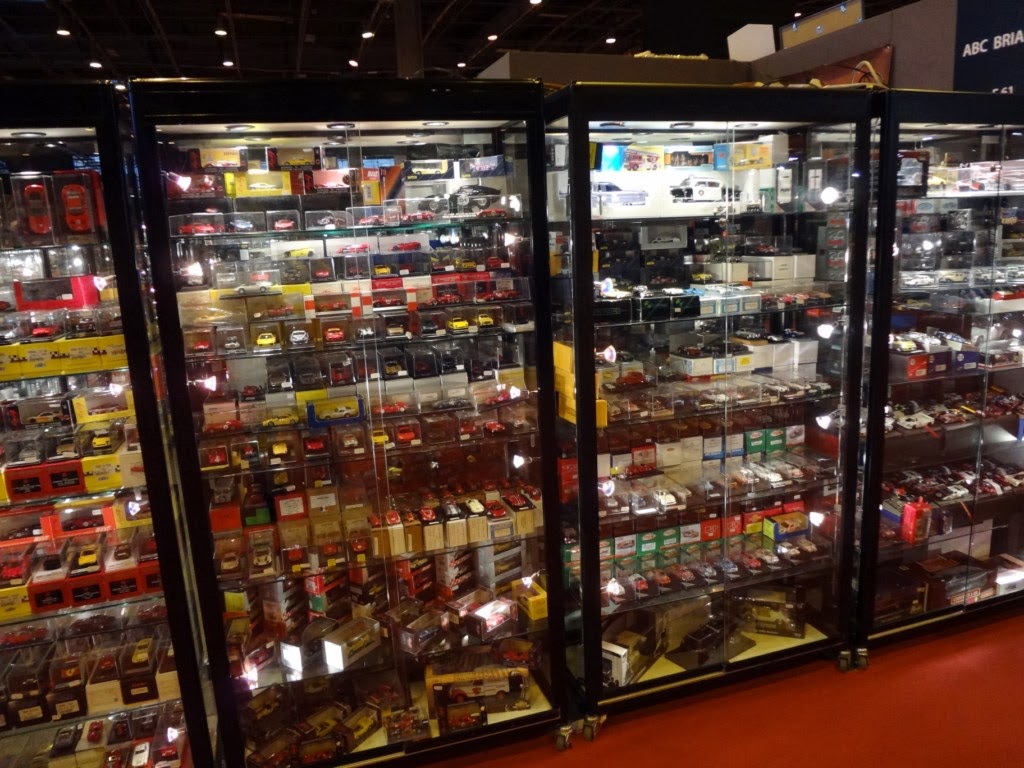
Le foto della Retromobile più conosciuta le troverete ovviamente in giro per Internet, anche se spero di pubblicarne qualcuna sul blog. Ciò che più conta, in questa sede, è la parte modellistica. Ebbene, Retromobile edizione 2014 mi pare che non abbia detto molto di più rispetto alle edizioni del recente passato, al contrario della Retromobile più prettamente automobilistica, che peraltro sta prendendo la china di una sempre maggiore qualità, il che significa anche sempre maggiore esclusività, con conseguenze facilmente intuibili per gli espositori "piccoli", quelli che spesso fanno la fortuna di eventi di questo tipo. Sempre più numerose le case rappresentate ufficialmente (le francesi, certo, ma anche Porsche, Mercedes, Skoda, Caterham e chiunque altro possa vantare un passato automobilistico degno di questo nome). Tutta la manifestazione è ora ospitata nel padiglione 1, il che assicura una praticità maggiore - permettendo di avere sotto mano la situazione e di valutare con un certo criterio tutto ciò che è esposto con sufficiente rapidità. Il 2013 aveva portato la novità della rinascita di Minialuxe, presente anche quest'anno con un bello stand e diverse novità promozionali. La capacità di comunicazione non manca; sarebbe interessante se a fronte di investimenti abbastanza rilevanti siano arrivati risultati commerciali adeguati. Meno obsoleti del solito, con la presenza - di qualità - della Galérie du Jouet Ancien di Parigi, che nella settimana di Rétromobile sposta armi e bagagli al Palais des Expositions. Direi che la novità maggiore è la presenza dei belgi di Berlinetta Modelcars, che hanno portato quanto si produce da quelle parti in tema di speciali 1:43 e 1:18. Non solo Minerva, quindi, ma anche alcune Daytona montate su base Masta, alcuni Francorchamps Mini Models e poi i primi esemplari del kit Aston Martin marchiato MF43. Devo dire che quel Paperino anni trenta al posto della conosciuta fenice è qualcosa che grida vendetta al cielo. Ritorneremo sull'argomento.
Ecco intanto una panoramica di ciò che si può trovare in questi giorni al padiglione 1.


04 febbraio 2014

Parigi, Retromobile: vigilia dell'apertura

Arrivato oggi a Parigi, in tempo per assistere agli ultimi preparativi prima dell'apertura di Retromobile. Per le strade che collegano il centro delle esposizioni con l'abitato di Issy-les-Moulineaux, alcuni carrelli con auto che saranno esposte da domani (una Porsche 356 rossa, una Mercedes 190 SL ecc.). Qui Retromobile, per quanto grande, è solo una delle tante rassegne ospitate contemporaneamente dal Palais des Expositions. L'ambiente è grande, ma ben organizzato. Oltre il ponte alle spalle del padiglione 1, è già Issy, una specie di sobborgo che una volta doveva essere aperta campagna. Al padiglione potrò arrivarci a piedi, il che è già parecchio. Anche quest'anno ho preferito Retromobile al salone di Norimberga, e penso che lo farò ancora finché non sarò costretto da cause di forza maggiore. Retromobile, come si è detto altre volte, dà un po' idea dell'ambiente degli artigiani, tanto per confinarci nel settore dell'automodellismo. E con l'enorme bonus di tutto ciò che sta intorno. Come qualità degli espositori e varietà dell'offerta, Retromobile è ai vertici mondiali. E in questo contesto, il modellismo ha la sua parte, che comunque non è la principale. Malgrado questo, i nomi più noti del settore si danno appuntamento sempre qui, all'inizio di febbraio. A domani.
Va ammesso: non è questo lo skyline più affascinante di Parigi, ma almeno sono a poche decine di metri dal padiglione 1! E Issy-les-Moulineaux non è poi così male (giusto dall'altra parte della piazza del Palais). 

01 febbraio 2014

'34 Ford Hot Rod affair: parte 2

First rough filing and sanding of the initial application of JB Weld Epoxy to fill in the roof cuts. Note, the curved body line at the roof to door edge will require additional filling and sanding to make a smooth body line contour.  Blow holes will require a second application of JB Weld Epoxy.  The rear window has been filed to a rough opening contour.

You can see the unchopped Host door sitting in the unchopped top opening,  You can see how much additional height had to be added to the door to make it conform to the opening.  In this picture, front axle height has been modified to stock height and 1940 Ford wheels and tires from an ERTL model have been installed.  Wheels will roll and front wheel will steer properly.  You can see one of the chopped top bodies in the background.

The door has been drilled and pinned and a cut made to obtain the proper door profile.

The pieces of the door needed to obtain stock roof height.  All pieces were drilled, pinned and epoxied in place.

One expoxied together, a wire reinforcement was JB Welded in place for added strength.

With door panel filed to fit and the wire strengthening piece in place, the door is ready for final filling and body work.

One photo shows both doors at stock window height with door panels modified and installed.

A Ford Motor Company archive photo shows the stock wind shield frame and windshield wiper.  Deluxe 34 Ford Three Window Coupes had two windshield wipers as Roy's model will have, donated from a 37 Ford Road Signatures model.  The stock height windshield frame needs to be hand fabricated.  After consultation between Jerry and myself, we decided to use a piece of "N" scale railroad track rail, which is an alloy brass material that can be easily bent and soldered.  The frame was made out of two pieces of N gauge train track.

One of the photos shows the two piece construction of the windshield frame soldered together. After polishing, it will resemble a chrome plated frame and it fit the opening perfectly.

The molded plastic hood had to be filled with plastic filler, since it had a hole in it for a blower scoop.  It had to be filled at the bottom also, since headers came though the side of it.

2 mm plastic molding was used to simulate the center hood hinge. Automotive spot putty was used to fill in minor imperfections.

Since the ERTL model had a filled roof and Roy's hot rod had a vinyl roof insert, 1 mm plastic half round material was heated and carefully bent and glued into place to simulate the roof insert. The molding will be precision masked and the insert painted flat black, after final paint has been applied. Note the final contour and smoothness of the roof body line at the door edge.

Finish primed body, doors and fenders with 40 Ford tires and wheels installed. Rear spare tire mount will be added in the next phase of the work with motor installed and front and rear bumpers added.


'34 Ford Hot-Rod affair: parte 2

Ecco qualche dettaglio in più sul lavoro che Joe Rybicki e Jerry Poniatowski stanno portando avanti su un Ford Hot-Rod di Ertl. Una breve presentazione la trovate in un post pubblicato ieri.

________________________________________________________________________________________________
PARTS CARS USED IN MODEL CONSTRUCTION : Note: No stock height topped 34 Ford has been made in 1:18th scale.

Purchased from Ebay, two 1:18th scale ERTL 34 Ford chopped top hot rod bodies with complete interiors. Cost approximately $20 US and one built ERTL 34 three window coupe model with blown big block and dropped front axle for the use of fenders, hood and grille. This model cost about $30 US and was complete in the box.  Also, purchased one Sollido 34 Ford Roadster for front and rear bumpers; cost approximately $25 dollars US.  Other detail parts in 1:18th scale needed to complete the model such as a battery, master cylinder, jack , etc., purchased from various suppliers found on Ebay.  Purchased one complete Chevrolet V-8 engine in 1/18th scale from Arizona Die Cast, with resin cast dual quad four barrel carburetors and two chrome air cleaners; cost about $10 dollars US. Purchased one ERTL 1940 Ford coupe model on Ebay for $30 dollars US for tires and wheels.  Purchased one 1937 Ford Cabriolet by Road Signatures for windshield wipers and side mirrors. That model will be used to build a 1937 Ford Slant Back Sedan, which is Jerry's present street rod.
_________________________________________________________________________________This is a photograph from the Henry Ford Museum archives of a stock 34 Ford three window coupe that was scaled to obtain the proper top height and top profile.


In this photo, the chopped top ERTL model sitting on 34 Ford fenders and the mag wheels that came from the blown ERTL hot rod model. Note, the blown model's frame was used and it had a dropped front. Since Roy's car was stock height, ride height had to be modified on the axle with a spacer to stock height.  Also, the blown model had a plastic hood with blower protruding out the top of it and headers coming out the sides of the hood. The hood was modified and used for this build (see later photo).


These are the two donor model bodies. One has already been stripped of its light blue paint, using chemical stripper.


Both bodies have had their paint removed and have started to be marked with felt pen as to where cuts would have to be made to obtain a stock top height.  Note the bodies are marked "Host" and "Donor" to avoid confusion as to where the different roof parts need to go.


The bodies were clamped to a work table and the appropriate cuts made with a hand saw and powered Dremel Tool.


Sixth Picture :  This picture shows felt pen markings on both bodies of cuts needed to obtain enough material out of one, the one on the Donor roof on the left to be added to the Host  body on the right hand side of this photo.


With one top removed, pie shaped cuts were made to begin to obtain the proper top profile.  These are the same techniques that would be used on a real car to unchop a top.  This is the most difficult part of the unchopping process.  An error here would ruin the body being used or would require much more body filler to correct. The corner of the top was bent backward to the right profile.
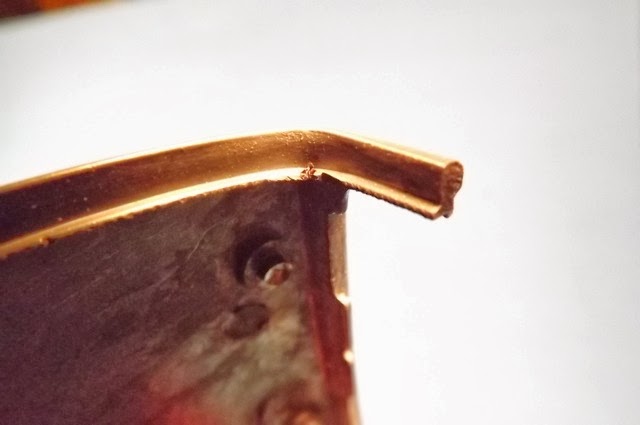
Note how the thickness of the die cast body varies, depending on location.  This makes the cutting effort more difficult.
One of the pictures shows the slit cut in the top necessary to obtain the correct profile.
A partial horizontal cut was made, after the vertical slit cut and the die cast metal very carefully bent backward to the desired profile of the back of the roof.  A pin has been drilled and installed in the rear roof portion.
In the corner of the front windshield pillar, a partial, very shallow cut was made and the pillar heated with a hair dryer to carefully bend the pillar backward.  The pillar will then be drilled and a brass pin epoxied into it for the top to be pinned to the cowl at final assembly.
The front windshield pillar has been drilled and a brass pin epoxied in place for structural rigidity and to make a good bond to the top.
Fortunately, the rear portion of the body metal was thick enough to drill and install a pin. This was done on both sides of the top.
Carefully placing the Donor roof onto the cuts in the Host body, you can see the puzzle of cuts necessary to obtain the correct top profile and height. The Donor roof is pinned and epoxied in place in this picture. The next step in the process is to mix JB Weld and fill in the cuts to eventually obtain a smooth body.  Any voids or holes will require another application of JB Weld epoxy. It can be filed and sanded and accepts automotive type lacquer primer surfacer.
A rear roof photo shows the filling and filing that will be necessary to obtain the required rear window opening.
One picture shows the application of JB Weld and the cuts made in the door frame to obtain the proper height to match the now unchopped top.  Looking closely, you can see that the door has been drilled and pinned for structural rigidity, since the hinged opening door will be the most delicate part of the model. Additional photos will show door reinforcing details.